Truing BC and muzzle velocity
A book BC and a factory velocity rarely predict your real drops perfectly. Truing feeds your actual downrange impacts back into the solver so its numbers match your rifle.
What is ballistic coefficient?
Ballistic coefficient (BC) is a single number that describes how well a bullet slips through the air — how slowly it sheds velocity to drag. A higher BC means the bullet holds its speed better, so it drops less, drifts less in the wind, and stays supersonic further out. A long, heavy, sharply pointed boat-tail bullet has a high BC; a short, light, blunt one has a low BC.
The number only means something alongside a drag model — a standard reference projectile shape the BC is measured against. The two you will meet are G1 (an older flat-based reference, still quoted for most hunting and lighter bullets) and G7 (a boat-tail reference that fits modern long-range match bullets much better). The same bullet has a different BC number under each model, so always enter the BC and the drag table as a matched pair from the manufacturer.
Manufacturers publish BC from their own testing, often rounded or optimistic, and it also changes slightly with velocity and altitude. That published figure is a starting point — truing, below, corrects it to what your rifle actually does.
What truing does
The calculator predicts drop from muzzle velocity and ballistic coefficient. If those inputs are slightly off, the error is invisible near your zero but grows with distance — you dial the card at 800 m and land half a metre low. Truing adjusts BC, muzzle velocity, or both so the predicted trajectory passes through the impacts you actually recorded.
Roughly speaking: a velocity error shifts the whole curve and shows up from mid-range out; a BC (drag) error compounds and dominates at long range and toward the transonic zone.
Before you start
- A confirmed zero and a working firing solution — you dial the solver's dope and measure how far it misses.
- A muzzle velocity on the card. Truing can't build a baseline trajectory without one; set it in the Ammunition section — ideally a chronograph average from this rifle and lot, not the box figure.
- Environment entered for the day you collected the data.
- Impacts at two or more distances — three or more spread across your usable range gives a much more reliable solve. Include a distance well out (but before the bullet goes transonic, where drop stops behaving predictably).
- Calm conditions, or at least a known, steady wind — vertical stringing from gusts will pollute the drop numbers.
Running the wizard
On the Calculator page, open the Ammunition section and click Tune to open the Zero/DOPE Truing Wizard.
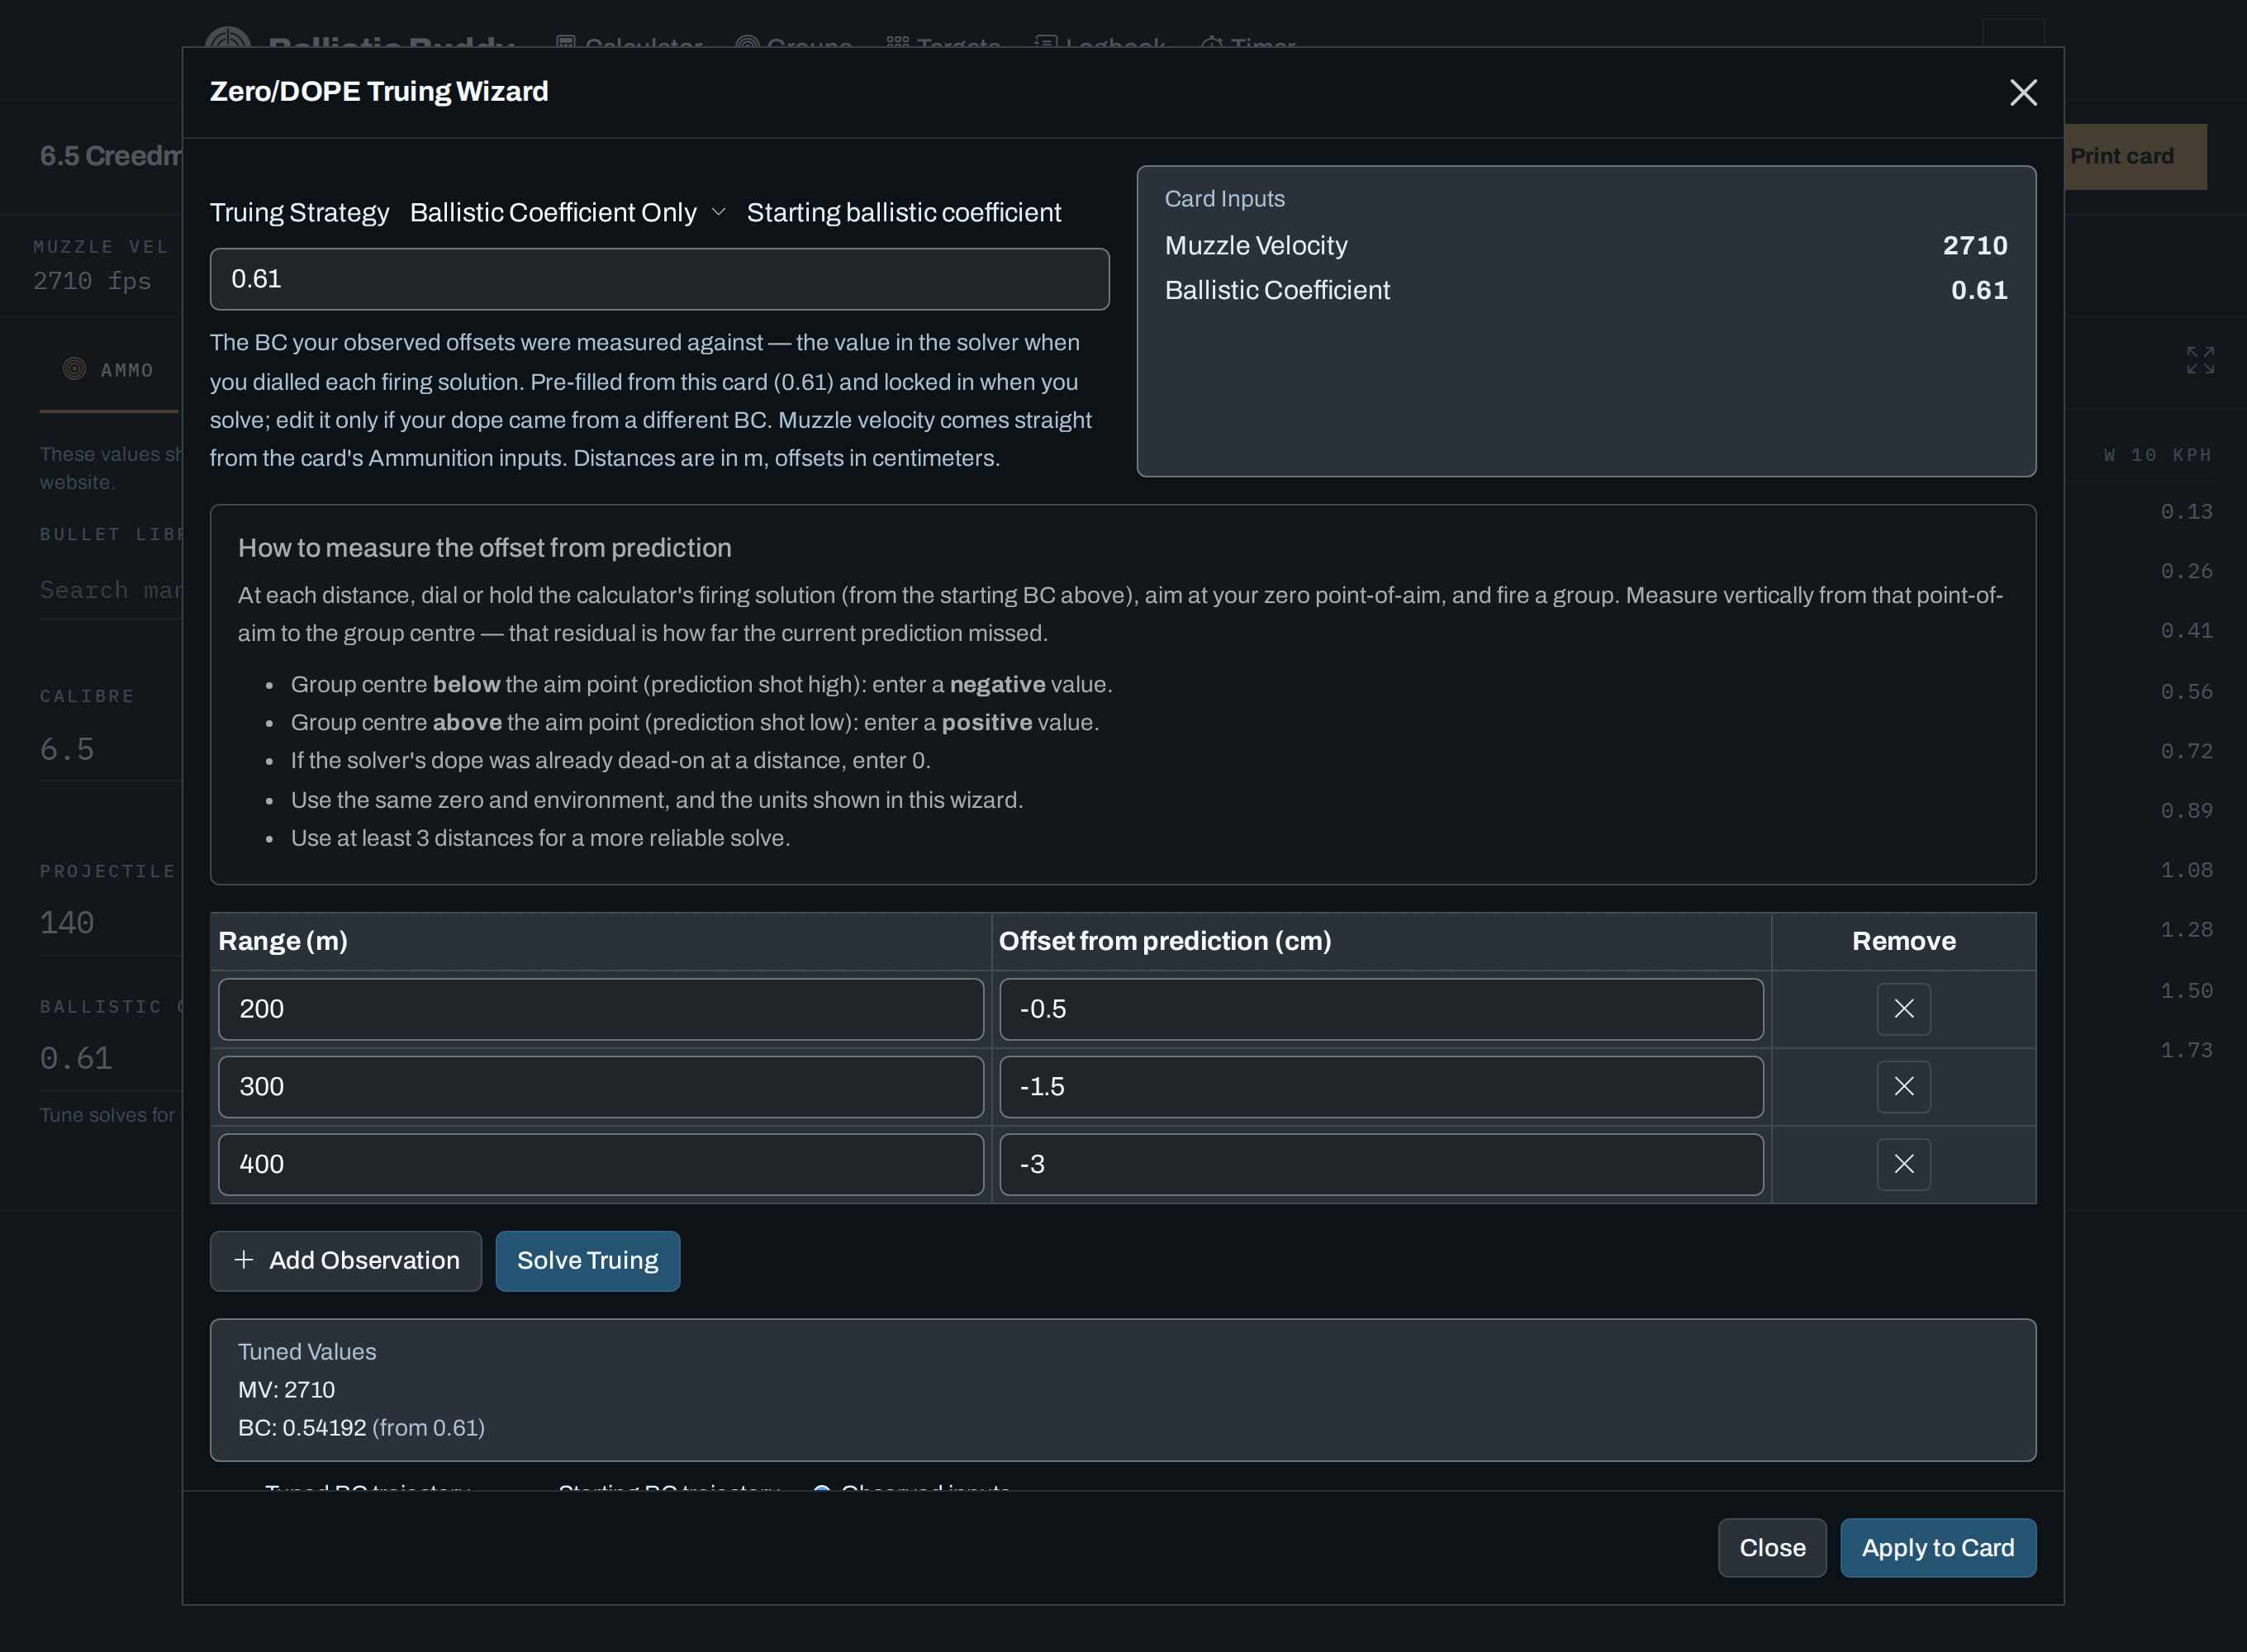
1. Choose a strategy
| Muzzle Velocity Only | Trust your BC, solve for velocity. Good when you have no chronograph and your near-to-mid dope is off by a consistent amount. |
|---|---|
| Ballistic Coefficient Only | Trust your chronographed velocity, solve for BC. The usual choice once you have real velocity data. |
| Combined (MV + BC) | Solve for both. Needs good data at several well-separated distances or it can find an unrealistic pair that happens to fit. |
2. Set the starting ballistic coefficient
The Starting ballistic coefficient field is the BC the solver used to produce the dope you are about to shoot. It is pre-filled from your card and locked in the moment you solve, so applying a result back to the card doesn’t move the baseline out from under you. Change it only if the firing solutions you dialled came from a different BC. Muzzle velocity is taken straight from the card’s Ammunition inputs, so make sure one is set there.
3. Measure and enter the offset from prediction
Offsets are measured against the solver’s current prediction, not the full drop from your line of sight. At each distance:
- Dial or hold the calculator’s firing solution for that distance.
- Aim at the same point of aim you zeroed with and fire a group.
- Measure vertically from the point of aim to the centre of the group — that gap is how far the prediction missed.
- Group centre below the aim point (the solver shot high) → enter a negative value.
- Group centre above (the solver shot low) → positive.
- If the dope was already dead-on at a distance, enter 0 — that is still a useful data point.
- Use the distance and offset units shown in the wizard (they follow your card).
Add a row per distance with Add Observation, then click Solve Truing. The wizard turns each offset back into a full trajectory point using the starting BC, so the maths is the same as before — you are just entering the small residual instead of measuring a big drop off a bare point of aim.
4. Check the result
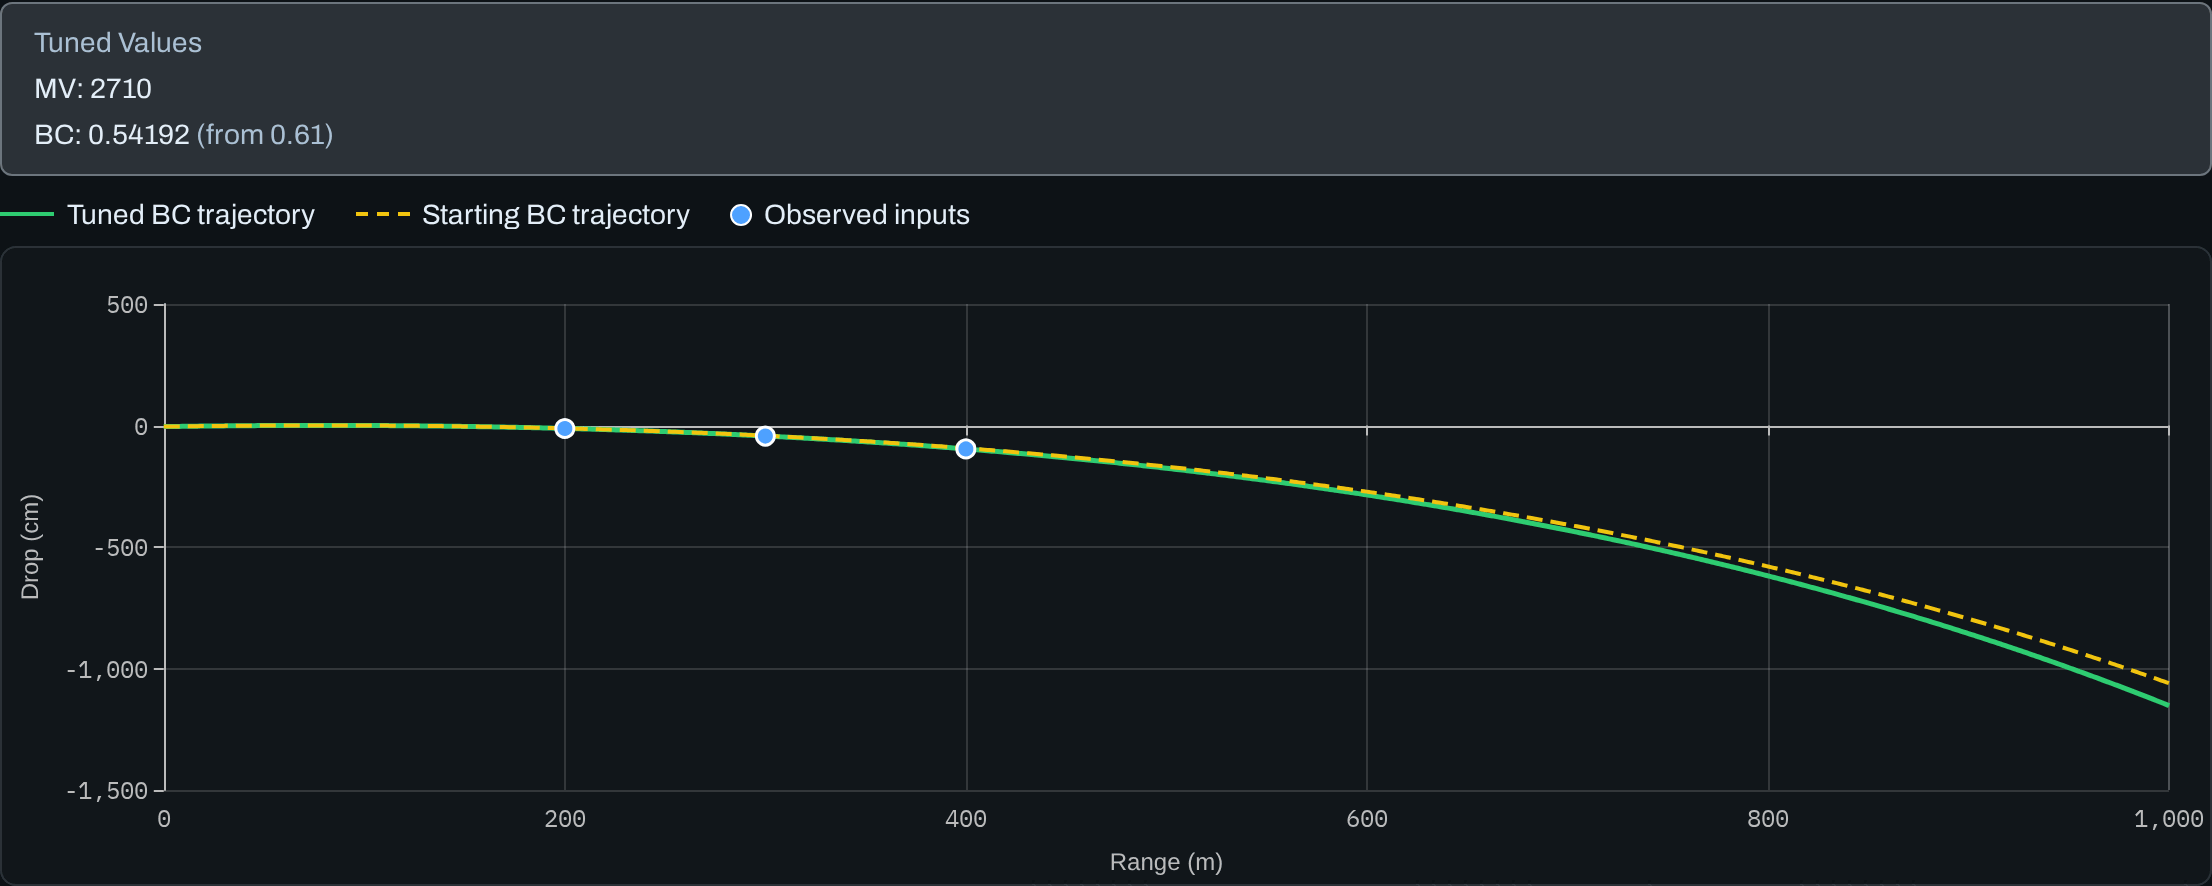
The Tuned Values box shows the solved MV and BC (and the starting BC it corrected from), and the chart overlays the tuned and starting trajectories with your data points. If the solved number is wildly different from the book value (a BC that halved, a velocity 150 fps off a good chrono reading), your data or units are probably wrong — recheck before trusting it.
5. Apply to card
Apply to Card writes the solved values back into the Ammunition inputs. Save the card, then confirm the new dope on paper at a distance you did not use in the solve.
Caveats
- Garbage in, garbage out. A sloppy zero or mismeasured drop produces a confident, wrong BC.
- It is specific to this rifle, barrel and lot. A new lot of powder or a fresh barrel can shift things; re-true if your confirmed dope drifts.
- Truing hides other errors. If your sight height or drag model is wrong, the solver will distort BC to compensate and the fit will fall apart outside the distances you used.
- Past the transonic zone, all bets are off. Don’t true against data collected there.